Wednesday, October 30, 2013

Going Batty for Halloween!

I didn't go all out decorating my classroom for Halloween, but our class mascot and pumpkin both got costumes!  I can't take credit for the little paper witch hat and broom.  One of my students made those for the mascot when they took her home yesterday.  So creative!

Apples, pumpkins, flowers.  .  .  plants, plants, plants!  We had our fill of plants and learned all of their parts and needs, so it was time to move on to animals.  What better animal to study the week of Halloween than BATS!  We have been going batty this week--studying bats, as well as doing some fun activities with them.

We started by making our own bats and attaching labels to the different body parts.  I traced the templates and the kids cut them out and put them together.  We did the labeling together since it was our first day of bats.  You could always do this activity at the end of a bat unit to see if your students know where all of the body parts are.


This was my example up on the board.

I hung all of the bats from the pipes in the ceiling for classroom decoration (sorry this isn't the greatest picture.)  The kiddos loved it!


Reading is a great way to learn, so we read some books about bats this week as well.  After reading and discussing, we worked together to make a chart of bat facts.  Here is what we came up with.


Each student had their own graphic organizer to complete as well.  Head on over here to Alissa's store on TpT for the freebie I used!  Thanks Alissa!  I left the chart of facts on the board for them to use as a resource.


I think the highlight of the week for the kiddos so far has been measuring bats.  Don't worry, not real live bats!  I got this great measurement freebie from Jessica on TpT.  It includes the bats, as well as the handout for the kids to fill in.  I made 2 copies of the bats and laminated them, so the kids could share them, and I could reuse them each year.


They were SUPER excited about getting candy corn, even though I only let them eat 2 pieces and packed the rest up for them to take home (no sugar highs in my classroom!!)  We went over the answers together at the end of the lesson.  I loved how they clapped whenever they got each answer right!

We have a couple more days of bats in store, but I am not expecting to get too much accomplished tomorrow with all of my kids in costume.  I will let you know how it goes!

Friday, October 25, 2013

Pumpkin Math and More!

We have learned all about pumpkins in my class.  This week we got to explore one, inside and out!

 We started by using our pumpkin for math.  We measured the height, circumference and weight.  The kids had to make estimates before we actually measured each of these aspects.

The height was measured using cubes.  Each child constructed a tower of cubes to show how tall they thought the pumpkin was.  They recorded these on their paper by coloring in the corresponding number of boxes.  Everyone got to compare their tower to the pumpkin, identifying whether their tower was taller or shorter than the pumpkin.  Then everyone recorded the actual height and circled whether their estimate was more or less than the actual amount.


The next day, we estimated the circumference of the pumpkin by cutting lengths of yarn.  I helped them measure the yarn with a ruler so they could record it on their paper.  Each student wrapped their yarn around the pumpkin to see if it was too short, too long, or just right!


As they measured, I gave each student a piece of tape to place their yarn in the correct category on our chart.  I think they did pretty well with estimating the height and circumference!


Estimating the weight of the pumpkin was a different story!  I passed the pumpkin around for each child to hold it and guess how many pounds they thought it was.  44, 43, 38. . .  this was a sugar pumpkin (the little ones you use to make pie!)  To get their estimates a little closer I told them they should guess a number less than 20.  They recorded all of this in their pumpkin math books.


I brought in a food scale to weigh the pumpkin.  I wasn't going to carry a full-size scale on my walk to school!  It worked just fine since we had a little 2.7 lb pumpkin!


Next, it was time to cut open the pumpkin!  I cut off the top, which sort of freaked the kids out because I used a huge knife (don't worry, I made sure they were not anywhere near it, not to mention it wasn't that sharp.)  While I was cutting, I passed around a paper for everyone to guess the number of seeds.

Each child had to reach their hand into the pumpkin and pull out some of the seeds.  Some of them were very reluctant to do this, but I told them it was mandatory.  Everybody has to get their hand in icky pumpkin goop sometime!  It is part of childhood.  No getting around it in my class :)


After we pulled all the icky seeds out, it was time to start counting!  They counted out ten seeds on each little pumpkin.


We had a LOT of seeds in our little pumpkin!  487 to be exact!


I was not expecting quite this many seeds!  It was a little high for some of my kiddos to count!  It was also a little too much for some of the pages in my pumpkin math book.  I think next year I will just have them record the amount of seeds that they counted, not the total amount.


We counted the seeds by 10's, so we practiced writing those numbers too (no, I did not make them write all the way to 487!)  They did okay until they got to 100 and then they didn't know what to do, so I wrote the numbers on the board for them to copy.  We're still learning!


They also colored in a pumpkin each time they had a group of 10.  We did this after we washed our hands so we didn't have pumpkin goop all over our crayons and papers!

To tie in some science, we tested to see if our pumpkin would sink or float when placed in a tub of water.  Unfortunately, I forgot to take a picture of this :(  It was pretty amusing to see because we had already scooped out all of the seeds when we did this activity.  It looked like a little pumpkin boat!  (I forgot we were supposed to do this before we cut it open!  Oops!)  Most of the kids guessed it would sink because it was heavy, but it actually floated!  They drew a picture in their pumpkin math books to show what happened.

After we had our fill of pumpkin math (not really because they would have gone on forever, I just ran out of ideas) I took the pumpkin and seeds home.  I baked the seeds in the oven so they could taste them the next day.  Here is the recipe I used if you are interested in doing this as well.  (I used the same cooking method, but only seasoned with olive oil, salt, and pepper.) The kids loved them!

I also baked the pumpkin so we would have pumpkin puree.  It was super easy!  Cut the pumpkin in half.  Place it on a baking sheet cut side down and cover with foil.  Place in a 350 degree oven until fork tender (1 to 1.5 hours).  Let it cool slightly and you can scoop the inside right off the shell!

You may be wondering what I did with this pumpkin puree!  I took it back to school and used it to make pumpkin chocolate chip bread with the kids!  My amazing boss had all of the other ingredients on hand at school.  I spread it all out on a tablecloth on the carpet in my classroom.


I read through the recipe and let the kiddos help measure some items out.  They also got to help with the mixer, which was a little nerve racking.  I was afraid one of them was going to lift it out of the bowl and get batter all over me!  It all went smoothly, and we had delicious bread for afternoon snack!  They were definitely fans of the bread, and so was I!  Here is the recipe if you want to try it!


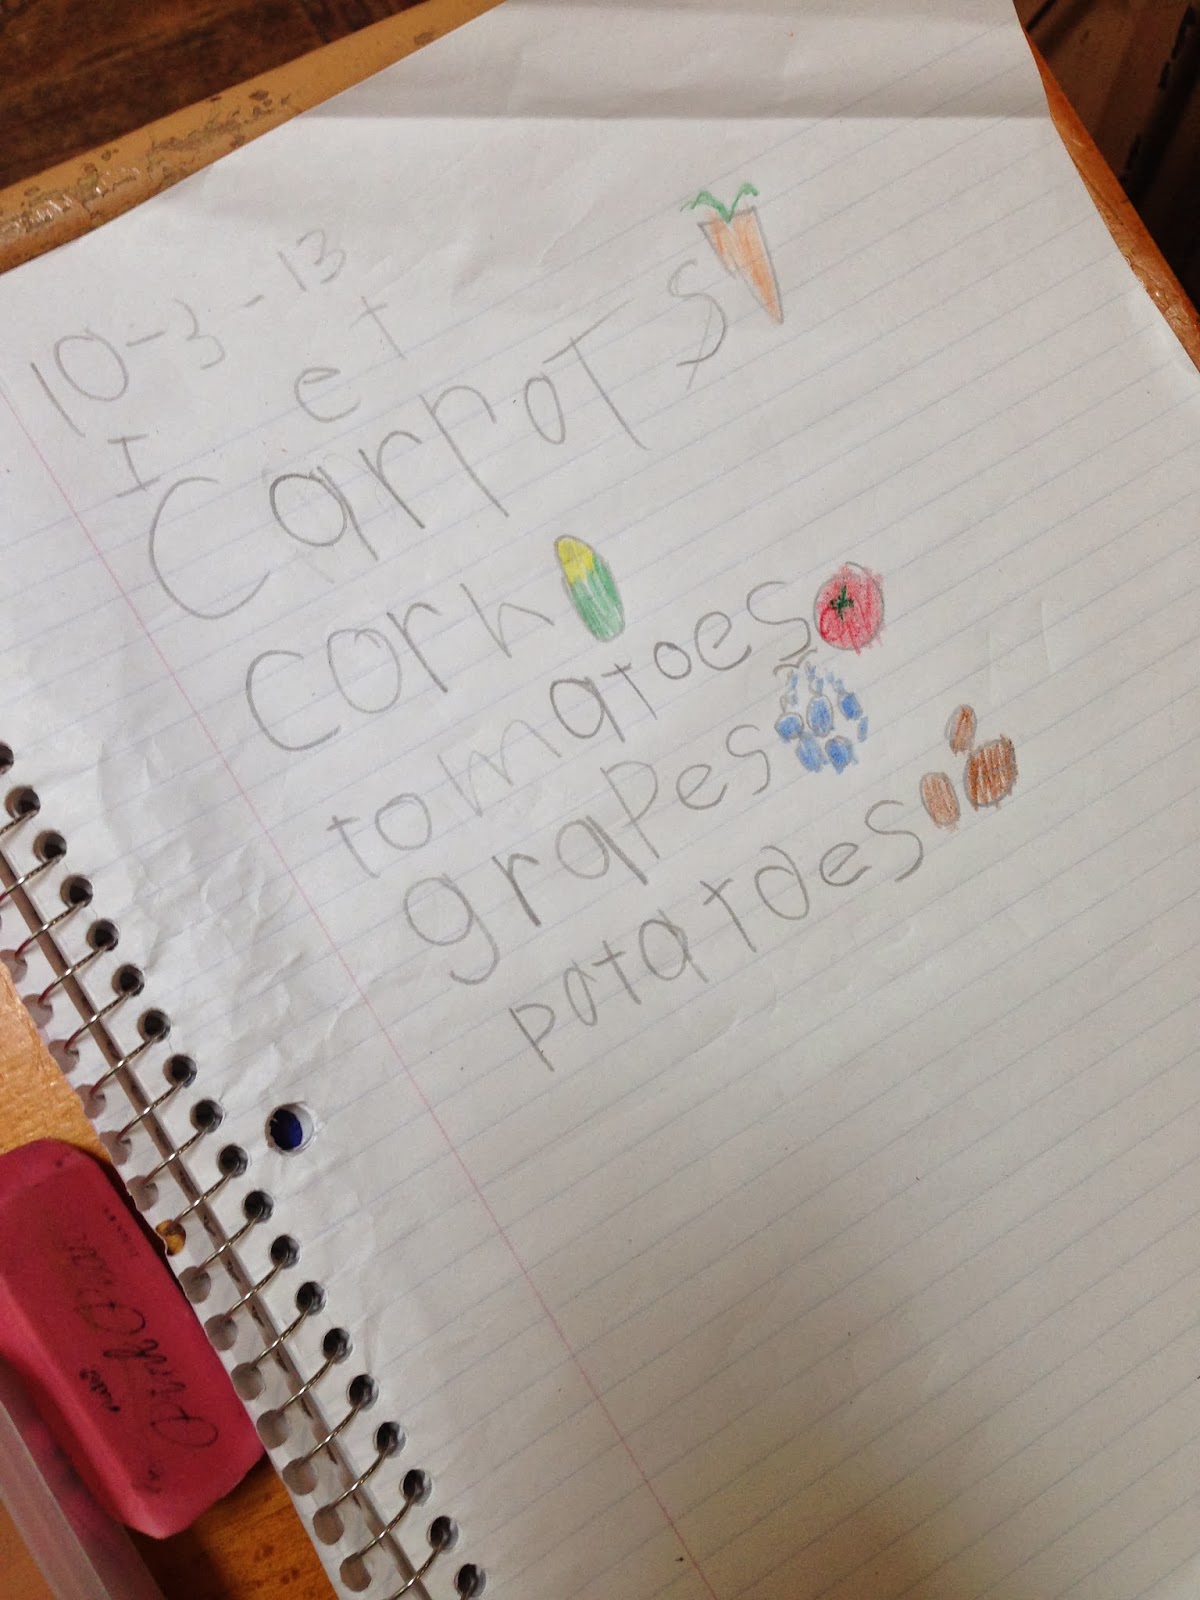
Afterwards I had the kids write/draw a "how to" piece to tell how we made the bread.  They were allowed to write about something else you can make with a pumpkin if they preferred.  One student chose to write directions for making pumpkin pie.  I found this one really amusing!  See if you can figure out why.


Kids are so funny!  If only it could be that simple!  It would be a really healthy pie that way!

We finished off our pumpkin unit with a trip to the pumpkin patch today.  Some of them got excited when they saw a green pumpkin in the sea of orange.  "Look, a green one!  It isn't ready yet!"  I am glad to see that they remember the pumpkin life cycle I taught them!

All of the pages used in the pumpkin math book are available at my TpT store, or you can just click here!  Have a great weekend!  If you are looking for something to do, make some pumpkin bread!  It is absolutely delicious!

Thursday, October 24, 2013

Jumping like Jack, Be Nimble!

Happy Thursday everyone!  We had fun with a measurement activity today, so I thought I would share it!

Our Nursery Rhyme this week is Jack, Be Nimble.  For those of you who are not familiar with this rhyme, a little boy named Jack jumps over a candlestick.  Don't ask me why a little boy would be jumping over a candlestick, I would encourage him not to, but there are a lot of Nursery Rhymes that don't make much sense to me (a cow jumping over the moon?)

In an effort to help my kiddos remember the rhyme, we made our own candlesticks.  Ok, for the sake of time (and because I didn't have enough paper towel rolls) I made the candlesticks.  Next year I will remember to save more or ask for donations, so that every child can make their own.  I was lazy and didn't even cover/paint mine, so we had brown candles, but the kids didn't mind.

We measured the height of the candlesticks using standard (inches) and nonstandard (cubes & paperclips) units.  They did this in groups of 2-3 since there were only 4 candlesticks.


They recorded all of their answers on their paper.


After we measured the candlesticks it was time for some jumping like Jack!  I lined the candlesticks up on the floor and showed them how to jump over them.  (They got a kick out of watching me do it!)  Each child got a chance to jump over the candlesticks. 


 Each time a new student jumped, we recited "Jack, Be Nimble."  It may seem like a lot of times to recite the same thing, but I think they all had it memorized by the time we were done!  They all had a lot of fun with this, and whenever someone knocked one over they said, "Oh, no!  You burned your toe!"

If you want to have some fun jumping with your kiddos, head on over to my store to pick up a copy of the worksheet and rhyme.  

Come back tomorrow for all the photos from this week's pumpkin extravaganza!!!


Friday, October 18, 2013

Pumpkins, pumpkins, and more pumpkins!

My planning may not have been the best this week.  I totally forgot to get a pumpkin and do "Pumpkin Math" while I was teaching about the life cycle of a pumpkin.  While disappointing, it just means that we get to have two weeks of pumpkins, which works out well because we are going to the pumpkin patch next Friday!  It will be our pumpkin celebration!!!  We still managed to do quite a bit with pumpkins this week, so here it is!

We made a pumpkin chart at the beginning of the week to show what we already knew about pumpkins.


As you can see from the chart, we also studied the life cycle of a pumpkin.  The kiddos helped me decide what to draw after we read a book about pumpkins.  Then they completed a worksheet where they had to color and glue the pictures in order to show the life cycle.  We compared the life cycle of an apple to the life cycle of a pumpkin so they could see the similarities/differences.  Next week we are going to be learning about plants in science, so this will be reinforced once again.


I have a plethora of pumpkin books.  The kids loved hearing the nonfiction pumpkin books just as much as the silly fiction ones!  It makes me happy when I see how much they love to learn :)  Unfortunately, that also means they want to shout out what they know all the time (which can get a little noisy!)   Yes, with kindergarteners you have to reinforce the fact that they have to raise their hand to share their thoughts (basically every day. . . for the entire year).

Here are a few of the books that we read this week!


After we read Pumpkin Jack they got to design their own jack-o-lanterns.  They were so excited you would have thought I had given each one of them an actual pumpkin to carve.  Nope, just an outline of a pumpkin for them to draw and color.  The music teacher came in while they were working and she couldn't even say hello before they were all holding up their designs to show them off.


Of course, they weren't just drawing pictures, they had to write sentences to describe their jack-o-lantern as well.  I encouraged them to use shape and color words, since we had already learned about them.  They could use the shape and color charts in the classroom to help them spell the words correctly.


I read them a book about a class going to the pumpkin patch to get them even more excited about our field trip next week.  Afterwards, they each wrote about what they want to do with their pumpkin after they pick it out at the pumpkin patch.  In case you are getting a pumpkin too, here are a couple of ideas you may want to put to use. . .

 (I will carve my pumpkin into a jack-o-lantern.)

(I will carve it and stuff it with candy.)

It was a great pumpkin week, but I can't wait until next week when the kiddos get to experience pumpkin math!  I haven't told them about it yet but I know they are going to love it.  Some of them have never scooped out the inside of a pumpkin or tasted pumpkin seeds!  I like to open their eyes to new things, so we will definitely be cutting open a pumpkin and roasting the seeds next week.  Come back and visit to see what else I have planned!

--Lauren

Friday, October 11, 2013

Apple Activities!

Plants and animals are in the K/1 curriculum, so we focused on a certain kind of plant this week, the apple tree.  This went right along with our farm unit, so it was perfect timing!

I have to send a big thank you out to Jessica Williams.  I found her apple freebie on TpT and used a lot of her ideas this week.  Click here if you want to snag her awesome handouts as well!

We started off the week by learning about Johnny Appleseed.  I read them a couple of books about the man who loved apples so much and they completed papers showing the facts they learned about him.  (The paper is included in the packet mentioned above.)

We made a chart at the beginning of the week to show what we already knew about apples.  They knew quite a bit to begin with (everything in the red apple!)  They also came up with some questions they had about apples.  As you can see, they sort of stuck to a pattern as far as the questions were concerned.  At the end of the week, I filled in the green apple with any new information they had learned.


  I brought in a few apples so we could do a taste test.


The kids predicted which color apple they thought they would like best.  Most of them guessed red or green.  I cut up the apples and gave them each a cup with the three kinds.


They had to use their five senses to observe the apples before tasting them.  This definitely sparked some conversation.  I loved just sitting back and listening!  After the tasting was complete, they colored the apples on their paper to show how they ranked the apples.


I also gave each student a small apple that they colored to show which kind was their favorite.  I taped the little apples to the whiteboard to create a bar graph.  There was an obvious apple winner!


The kiddos completed a bar graph of their own to match mine and then we completed the other sections of their paper together.


To tie in some writing, I had them write about what they discovered when using their five senses.  They completed a paper that told how apples taste, feel, sound, look and smell (this is included in Jessica's packet).  Toward the end of the week we discussed the parts of an apple.  They knew the basics, but core and flesh were two new words for them.  To help them remember the parts, we made apple diagrams.  They had a little trouble finding the core, so we drew some lines down the middle with a pencil.


At the end of the week they did some journal writing.  They were allowed to write about anything that had to do with apples (a trip to an apple orchard, their favorite apple dish, what they know about apples, etc.)  I thought this kinder did an amazing job sounding out her words ("Apples make my favorite juice.")!  I love seeing their skills and confidence grow :)


If you enjoyed our apple activities, come back next week for PUMPKINS!!

--Lauren


Friday, October 4, 2013

Fun with Farms

With fall come leaves, apples, pumpkins and beautiful colors.  All of these things come together at the farm, so that is what we studied this week.  We started by making a list of things that you find on a farm.  They did really well (however I was not so successful at making a barn out of construction paper.)  


The kids got to show their stuff by writing about what they like to eat that comes from a farm.  


They also cut pictures out of magazines to show things that come from a farm.  One day we read all about farm animals and the kids chose their favorite one to write facts about.  Sorry I don't have any pictures of that day's work.    

We read lots of farm books this week.  The kiddos were so into it that they started bringing farm books from home to share with their classmates!  We read Mrs. Wishy Washy and made puppets to act out the story.  I sent the puppets home and told them to retell the story to their parents.  I wonder how many of them actually did.

I thought it would be fun to celebrate our farm week by making something to eat.  We made butter!!!  It is simple, so if you are studying farms or cows you should give it a try!  Pour about 1/2 cup of cream into a jar (I used glass jars I had at home, but any sort of container should work as long as it doesn't leak).  

Then shake!
I prepared two jars, so I called two students over to shake while the rest were doing their phonics work.  When they looked like they were starting to get tired I had them switch with someone.  They got such a kick out of this.  They were also working their muscles, as one student pointed out.

I didn't even tell the kids what to look for, but they knew when it was ready!  It separates into butter (the solid) and whey (the liquid).  I used a spoon and scooped the butter out of the jar, leaving the whey behind.

As you can see, one of the butters became a little more solid and yellow than the other.  I guess those kiddos were better shakers :)


 I spread a little butter on some saltine crackers for the kids to try.  Eight out of ten gave it a thumbs up and wanted seconds and thirds!  Overall, I think our butter was a success.


Thursday, October 3, 2013

Shapes and Sheep!

We have been working on shapes this week.  The kinders have been doing great, so today we went on a shape hunt!  I made each student a pair of binoculars from paper towel or toilet paper tubes.  They loved exploring the classroom with them!  They were super quiet while they did it too, which was an unexpected bonus!


They hunted for triangles, squares, rectangles and circles.  I made a paper for them to record their findings.  They could draw the item, or write the name of it.  Some students liked the challenge of writing the words instead of using pictures.


If you would like to get the Shape Hunt paper for FREE leave a comment and let me know!

We have also been having fun with Nursery Rhymes in my class.  This week we focused on Baa, Baa, Black Sheep.  We had lots of fun with it!

They get b and d confused, so I made a letter sort for the pocket chart, using sheep and bags of wool.


We learned about sheep since we are studying farms this week as well.  The kiddos used what they learned to fill in a graphic organizer about sheep (we actually did this together as a class, which is why all the words are spelled exactly right!)


We finished the week by making a fluffy black sheep!  I mixed equal parts glue and shaving cream, and then added a little black paint to change the color.  (Make sure you don't stir it too much.  Mine started to lose it's fluff because I mixed it too long.)  Let the students use the mixture to create a sheep body.


I let these dry overnight, then we cut out shapes to make the legs and head.  They drew the other details on with crayons.  This was a shape review.  They identified the shapes needed and cut them out of their black paper.


I think they turned out really cute!  They earned a spot on the bulletin board.


They even enjoyed putting the rhyme back together in the Poetry Center.  I laminated the strips and added velcro to the back to use on a felt board (technically it is a"Question of the Day" board, but it works perfectly!)


All of the kiddos have learned this week's Nursery Rhyme already!  One step closer to the Nursery Rhyme Club!  Woo hoo!

If you think your little learners would enjoy spending some time with "Baa, Baa, Black Sheep", head on over here to pick up all of the pieces you need to make it happen!  I hope you are having a great week!  It is almost Friday!

--Lauren